In this tutorial, I will show you how to install TestNG in Eclipse in multiple ways. TestNG is a testing framework designed for the Java programming language. The framework is inspired by JUnit and NUnit. It is a cutting edge test automation tool that overcomes the limitation in the JUnit framework. In its initial era, it was only used in unit testing of the Java projects during the development phase.
However, nowadays it has become very popular amongst the testing fraternity because of its rich feature. TestNG plays an instrumental role in the test script development as well as test suite creation and execution. Some of its cool features are TestNG annotations, test case management, parallel execution, effective reporting, and much more.
So let’s explore how to install TestNG in Eclipse in three different ways. To install TestNG in Eclipse, please follow the instructions below.
Install TestNG Using Eclipse Marketplace
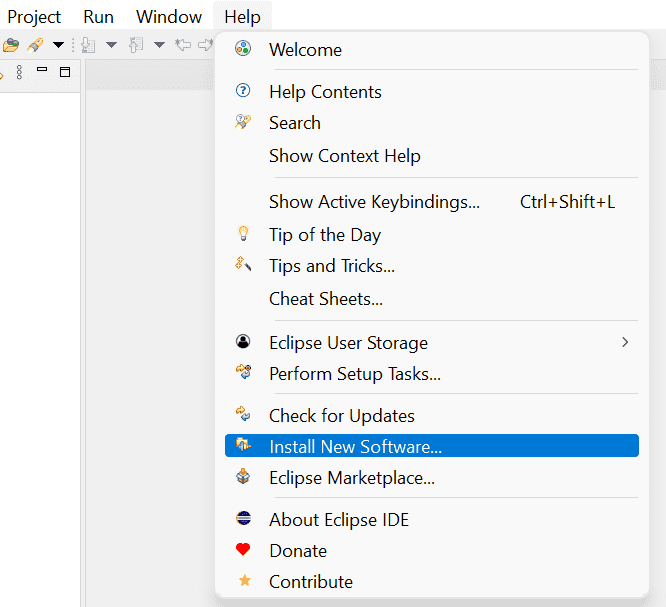
Step 1: Launch the Eclipse IDE and go to the Help > Eclipse Marketplace.

Step 2: A new window would come up, here you need to type “TestNG” in the Find search box and hit Enter Key or click on the Go button.
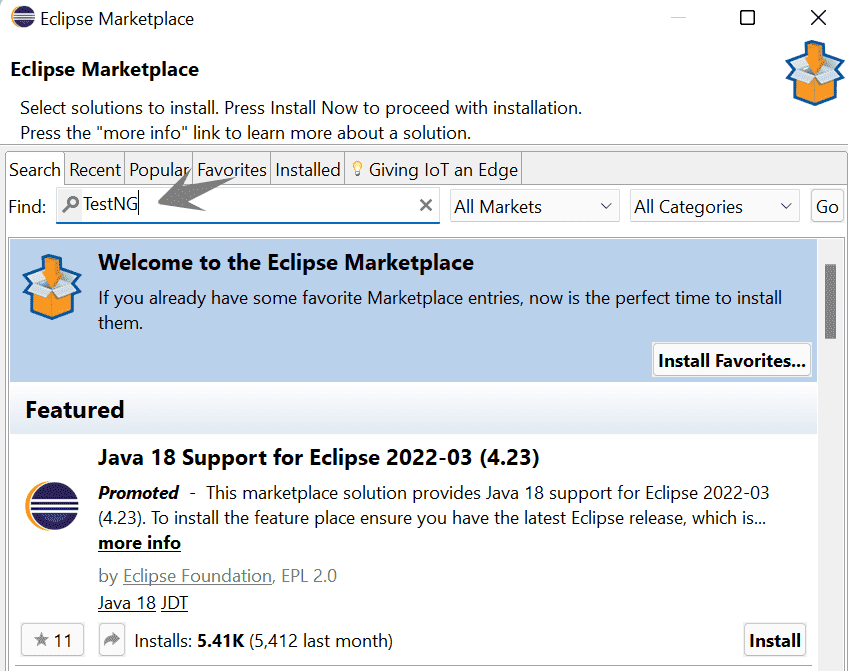
Step 3: The search results will now show TestNG for Eclipse at the top. You only need to click the Install button next to it.

Step 4: Eclipse may take some time to resolve features, after which you must verify that the TestNG checkbox is checked and click the Confirm button to continue.

Step 5: Review Licenses window may open up. Accept the license and click on the Finish button.

Eclipse will start installing TestNG that might take few minutes. You can see the progress at the right bottom of Eclipse.

A warning message may appear when the installation is complete. Click on the Install anyway button.

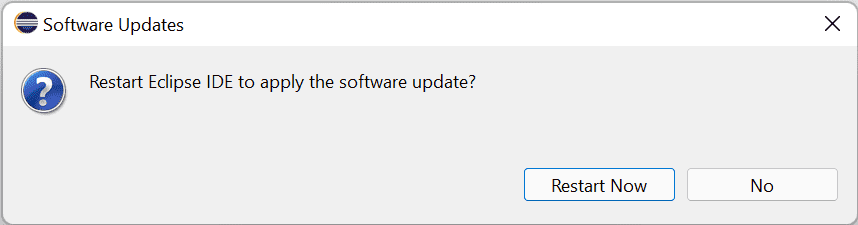
Eclipse will ask you to restart Eclipse to apply the software update. Click on the Restart Now button.
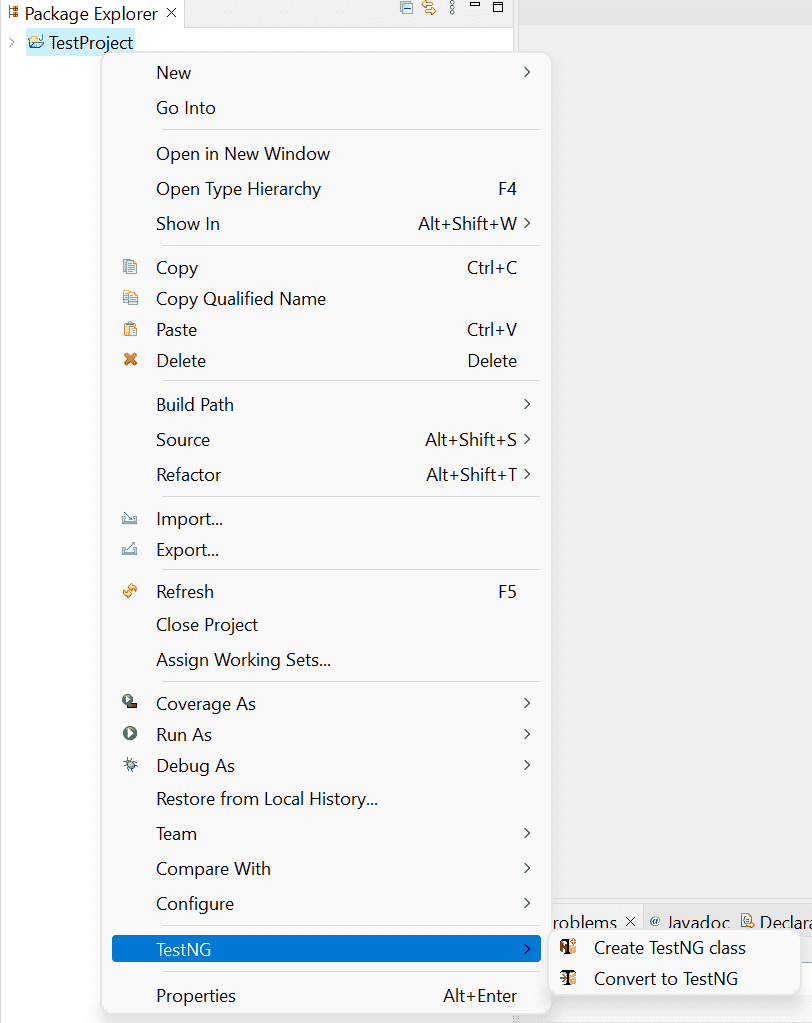
Step 6: After restarting Eclipse, you can check if TestNG is installed by right-clicking on your project and looking for TestNG in the opened menu option.
Install TestNG Using Install New Software Option
If the TestNG Plugin is not available in the Eclipse Marketplace, you don’t need do get disappointed. You can try this option.
Steps to Install TestNG in Eclipse as new software
Step 1: Launch the Eclipse IDE and go to the Help > Install New Software.
Step 2: The following dialog box will be displayed, click on the “Add” button.

Step 3: In the Add Repository dialog box, provide any name, let’s name it as “TestNG” and in the location field type “https://testng.org/testng-eclipse-update-site/” and click on the Add button.

Step 4: Eclipse will start looking for the TestNG plugin and might take a few seconds. Once it can find TestNG it will be displayed in the Software list. Select the checkbox against TestNG and click on the Next Button.

Step 5: You might see the following dialog box. Select TestNG and click on the “Next” button.

Step 6: Select the “I accept the terms of the license agreement” and click on the Finish button.
Step 7: You may see a Security Warning dialog box, in that case, click on the “Install anyway” button.
Step 8: The installation is now complete. Click on the “Restart Now” button.
Step 9: After the restart, you can verify whether TestNG was installed successfully. Do a right-click on your project and see if TestNG is displayed in the opened menu option.
Now you are good to go and start executing your tests using TestNG. To kick start with Selenium WebDriver Automation please refer to my post, Configure Selenium Webdriver With Eclipse
TestNG Offline Installation Using Local Library File
If you are unable to install TestNG using any of the accessible online methods, try the offline method. So, let’s see the quickest and most straightforward technique to install TestNG offline.
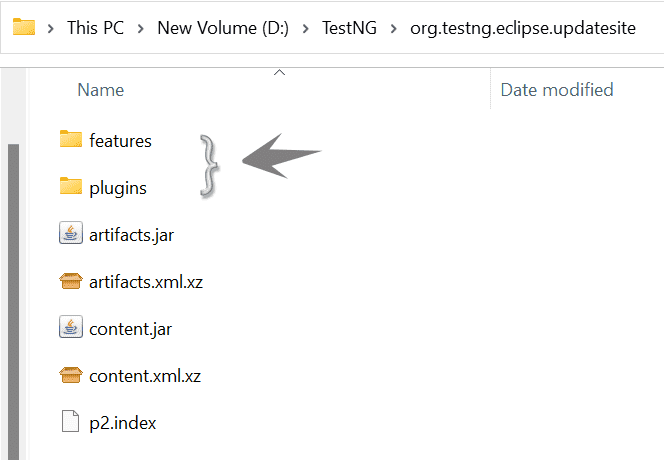
Step 1: Download the desired version of TestNG zipped file from https://github.com/cbeust/testng-eclipse.You’ll find download links under the TestNG for Eclipse Plugin section. After downloading it extract the files to any directory. I have extracted the files at the below path on my machine. You will see two directories at this location with names features and plugins. We will these directories to install TestNG.
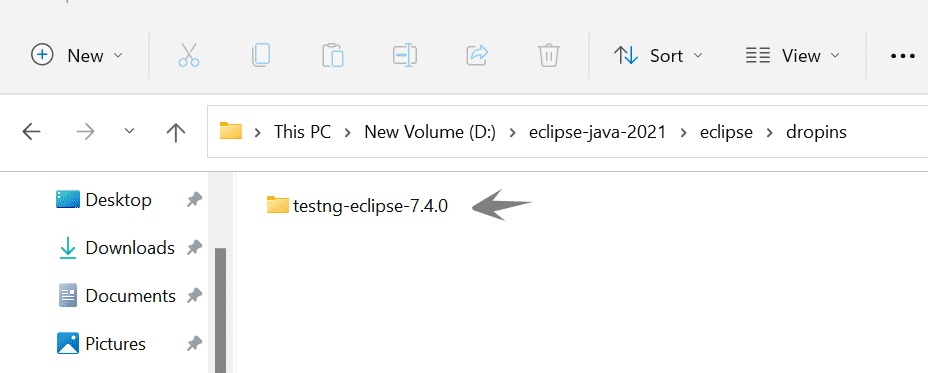
Step 2: Go to Eclipse installation folder > dropins. Inside “dropins“ folder create a new folder name it as testng-eclipse-7.4.0. Name it according to the version of TestNG har files you have downloaded. At the time of writing this post, the latest release version was “7.4.0.202106051955”.
Step 3: Now copy the features and plugins directories extracted from the TestNG zip file to this Eclipse “dropins” folder.

Step 4: Now launch Eclipse IDE and check if TestNG is installed by right-clicking on your project and looking for TestNG in the opened menu option.
Recommended Posts
- UFT Developer Installation in Eclipse IDE
- Overview of Micro Focus UFT Developer | LeanFT
- Configure Selenium Webdriver With Eclipse
- Selenium Webdriver Login Test Script
- How to Select a Radio Button In Selenium WebDriver And Do Other Validations?
- How to Set Text Value in TextBox In Selenium WebDriver And Do Other Validations?
- Click a Button in Selenium WebDriver and Carry out Other Validations
- 23 Most Useful Selenium WebDriver Commands That You Must know