Multiple Object Spying in OIC
In this article, I will show you how to spy multiple objects in LeanFT to create their object descriptions.If you don’t know how Object Identification Center works in LeanFT please refer to my post on How to Use Object Identification Center in LeanFT.Using the default settings in Object Identification Center we can create description for one object at a time. However, to speed up the automation test script development, LeanFT provides an option to spy multiple objects and create their descriptions all at once.In this article,I will show you how to do this.
In order to spy multiple objects in LeanFT, you will have to open Object Identification Center and click on the OIC Settings button (three sliders) present on the top left corner of the OIC window and select the checkbox “Allow multiple-object spying“.Now OIC will allow you to spy on multiple objects and generate the code in one go.

Now if you hover the mouse on the hat icon of OIC you will see a tool top “Start Spying”.Click on this hat icon to start spying and click on all the required objects which you want to spy. Every object on which you will click will be added to the OIC list and a counter will be displayed to show you how many objects so far have been added to the OIC. Once you are done click on the stop spying button that is visible only during spying the objects or press the ESC key on your keyboard.
The object identification window is displayed with all the spied objects. I have added three objects using OIC.
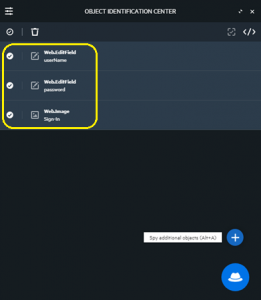
If you still need to add to additional objects click on the spy additional objects ⊕ button or press Alt+A key together. If you place the mouse cursor over an object it will give you the following options.
- Delete the object
- Highlight the object in the application
- Edit the object
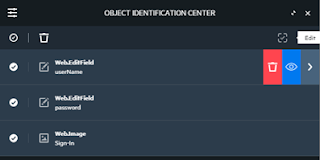
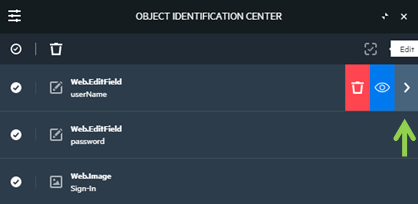
To delete the object click on the delete button. To highlight the test object in the application click on the eye button. To edit an object click on the right arrow button.
Edit object identification in OIC
If you are in single object spy mode, the OIC automatically opens on the edit page. In multi-object spy mode, hover over the object and click the Edit button.
The left pane of OIC displays the object hierarchy. The stars against the object properties represent properties that LeanFT is using to identify the object that is currently selected in the OIC.
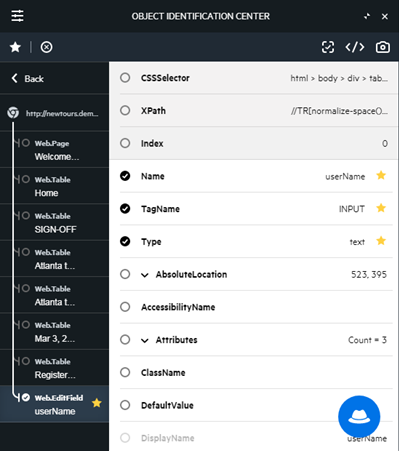
You can add additional object properties if required.
Add Regular Expression in Object Property in OIC
To enter regular expression values for string properties click on the property value. The property will become editable.
Enter the regular expression value in the property text box. For example Usernam.* to match any username like UserNameabc123.
Now click on the grey star icon to set the value as a regular expression.
The black bold star next to the object property indicates the string property has been replaced with a regular expression.
Generate Test Object Identification Code OIC
If you are in multi-object spy mode and editing object property click on the back button to go to the home screen of OIC.

In the home screen of OIC, there is a tick mark against every object.
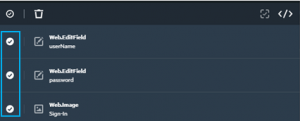
If you don’t want to generate the code for an object deselect it. Click on the Generate code to clipboard icon(</>). The generated code is copied to the clipboard. Paste the generated code into your test script. I have generated the code for the three objects added to the OIC.
|
1 2 3 4 5 6 7 8 9 10 11 12 13 14 |
EditField userNameEditField = browser.describe(EditField.class, new EditFieldDescription.Builder() .name(new RegExpProperty("userNam.*")) .tagName("INPUT") .type("text").build()); EditField passwordEditField = browser.describe(EditField.class, new EditFieldDescription.Builder() .name("password") .tagName("INPUT") .type("password").build()); Image signInImage = browser.describe(Image.class, new ImageDescription.Builder() .alt("Sign-In") .tagName("INPUT") .type(com.hp.lft.sdk.web.ImageType.BUTTON).build()); |
Note: When pasting generated identifications for a Web-based object, the browser parent object is called browser. If you using a different name for your browser test object, Please modify it in the pasted code. Likewise, you may have to replace the pasted parent identifications for Windows-based objects with previously defined variables for those objects.
Capture An Image of an Object in Multi Objects Spy Mode
The capture image(camera) button captures the image of the currently selected object in OIC and saves it to the file system. This could be useful for image verification. You can capture images of all required objects one by one. In multi-object spy mode, select an object from the list, and then click Edit. The object opens in edit mode. In the OIC toolbar, click the Capture object image button and save the file to the desired location.
You can also refer to my post on Create Application Model Project in LeanFT | UFT Developer & Write First Test in Java. The Application model works on the object repository concept where you can add objects to the Application Model rather than creating a test description.


