Micro Focus has rebranded LeanFT as UFT Developer. In this article, I will explain how to create a LeanFT testing project or UFT Developer testing project and create your first Test. If you want to know how to download and install UFT Developer and configure it in Eclipse IDE please refer to my post on UFT Developer Installation in Eclipse IDE. If you want to get an overview of UFT Developer please click here.
Note: The screenshots in this article are of LeanFT. However, the steps of creating a project in LeanFT and UFT Developer are the same.Please select the relevent options while creating the project if you are using UFT Developer.
Steps to Create a UFT Developer Testing Project And Create a new Test
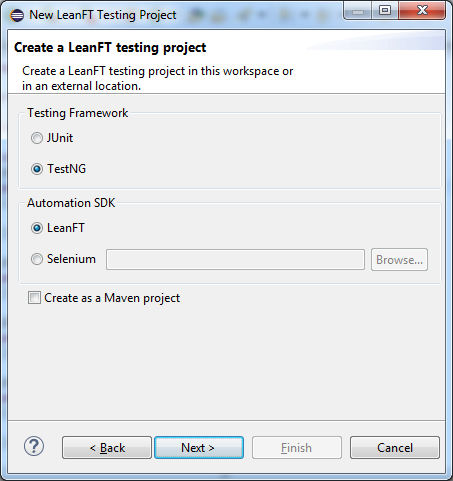
Step1: In the Eclipse IDE go to “New>File>Project“.Select LeanFT Testing Project and click on the Next Button.

Step 2: In this step, we will have to select the testing framework that is either JUnit or TestNG.Since TestNG is the most renowned framework and widely used across the organizations, let’s select TestNG.If TestNG is not configured in your eclipse please refer to my post on How To Install TestNG in Eclipse.

Step 3: Now you will have to enter the name of the project and package name. You can use the same what is given in the below screenshot and click on the Finish button. If you see a New module-info.java dialog box click on the Don’t Create button.

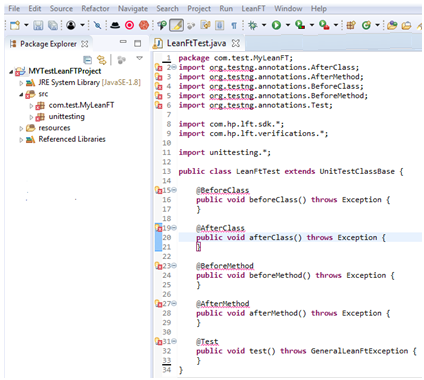
Step 4: You will see that LeanFT automatically creates LeanFtTest.java file inside the “com.test.MyLeanFT” package with the following empty template.

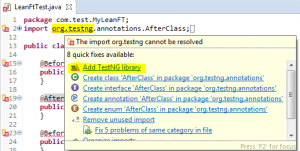
Step5: You will see there are errors in the project because the TestNG library is missing. If TestNG is already installed in Eclipse we can add the TestNG library to our project. To add the TestNG library place your mouse over the red underlined text. The eclipse will automatically show the suggestion to add the TestNG library. Click on the Add TestNG library option.

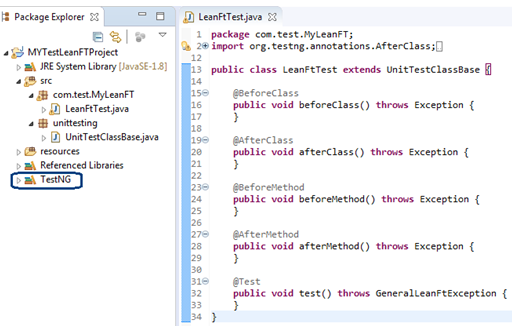
Step6: You will see that all errors have been fixed and the TestNG library has been added to the LeanFT project

- @BeforeClass: The annotated method will be run before the first test method in the current class is invoked.
- @AfterClass: The annotated method will be run after all the test methods in the current class have been run.
- @BeforeMethod: The annotated method will be run before each test method.
- @AfterMethod: The annotated method will be run after each test method.
- @Test: This annotated method is the actual main test method where you will have to write your actual test logic
Step 8: As of now we will only use @Test annotation and delete the rest of the methods with other annotations. Now copy the following code in the LeanFtTest.java file.
|
1 2 3 4 5 6 7 8 9 10 11 12 13 14 15 16 17 18 19 20 21 22 23 24 25 26 27 28 29 30 31 32 33 34 35 36 37 38 39 40 41 42 43 44 45 46 47 48 49 50 51 52 53 54 55 56 57 58 59 60 61 62 63 64 65 66 67 68 69 70 |
package com.test.MyLeanFT; import org.testng.annotations.AfterClass; import org.testng.annotations.AfterMethod; import org.testng.annotations.BeforeClass; import org.testng.annotations.BeforeMethod; import org.testng.annotations.Test; import com.hp.lft.report.ReportException; import com.hp.lft.report.Reporter; import com.hp.lft.report.Status; import com.hp.lft.sdk.*; import com.hp.lft.sdk.web.*; import com.hp.lft.verifications.*; import unittesting.*; public class LeanFtTest extends UnitTestClassBase { static Browser browser; //Initiazing browser object @Test public void test() throws GeneralLeanFtException, ReportException { try { browser = BrowserFactory.launch(BrowserType.CHROME); browser.navigate("www.google.com"); //Create Search Textbox Object EditField txtSearch = browser.describe(EditField.class, new EditFieldDescription.Builder().type("text").tagName("INPUT").name("q").build()); //Enter myskillpoint in the search text box txtSearch.setValue("myskillpoint"); //Create search button object Button btnSearch=browser.describe(Button.class, new ButtonDescription.Builder() .buttonType("submit") .role("") .accessibilityName("Google Search") .tagName("INPUT") .name("Google Search") .index(1).build()); btnSearch.click();//Clicking Search button //Create link object for the first Search result using 0 index Link firstResult=browser.describe(Link.class, new LinkDescription.Builder() .tagName("A").innerText(new RegExpProperty(".*myskillpoint.*")).index(0).build()); if(firstResult.exists(10)==true) { Reporter.reportEvent("myskillpoint shoud be displayed in search result", "myskillpoint displayed",Status.Passed); } else { Reporter.reportEvent("myskillpoint shoud be displayed in search result", "myskillpoint displayed",Status.Failed); } firstResult.click();//Clicking on the first result link browser.close();//Closing the browser } catch(Exception ex) { ex.printStackTrace(); Reporter.reportEvent("Exception occured "+ ex.getMessage(), "Search Text Box was not displayed",Status.Failed); } } } |
Now run this code as a TestNG test. Do a right-click anywhere in the code and select “Run As>TestNG Test“


