The prerequisite to configure Selenium Webdriver with Eclipse is installing Java as well as Eclipse. If you haven’t read these articles, please use the following hyperlinks.
To configure Selenium Webdriver with Eclipse we have to download
its Jar files. Open the link https://www.selenium.dev/downloads/
to navigate to the official Selenium Webdriver download page and scroll down the page until you see the following grid from where Selenium Webdriver can be downloaded for different languages.

As per the date 30th June 2020 the current latest version of Selenium Webdriver is 3.141.59 which is a stable version. The latest Selenium 4 Alpha version is also available for download but it might have some bugs. So, I would recommend to always download the stable version that is currently 3.141.59. If you are seeing this post after 30th June you can download whatever version is showing as the stable version.
Click on the Download link to download the stable version for java. The archive file of Selenium Java will be downloaded.

Now you will have to extract this archive file. Extract it in a directory where you want to place the Selenium and related Jars to use it in a Selenium project. For example, I am extracting it into the directory “C:\SeleniumJars”.

The Selenium jars are available to use. Now we will see how to configure Selenium Webdriver with Eclipse.
Steps to Configure Selenium Webdriver with Eclipse
The following things are required to be done to configure Selenium Webdriver with Eclipse
- Create a new Java Project
- Create a new Package
- Create a new Class
- Add Selenium Webdriver Jars to the Eclipse Project
Create a new Java Project
Step 1: Run the Eclipse.exe file to launch eclipse. It will ask you to provide a workspace name under. It is the path under which you can create multiple Java projects. Provide a valid path and click on the Lunch button.

Step 2: Eclipse will be open. The Welcome window for Eclipse might appear. If you see this you may close this Welcome window.

Step 3: You will see the package explorer in the left panel. Now go to File > New > Java Project.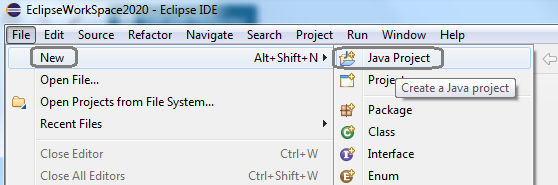
Step 4: You will have to give a valid project name and click on the Finish button.

Step 5: You may see the below window.If you see this click on Don’t Create button.

Step 6: The newly created project ‘FirstSeleniumProject‘ will display in Eclipse Package Explorer.

Create a new Package
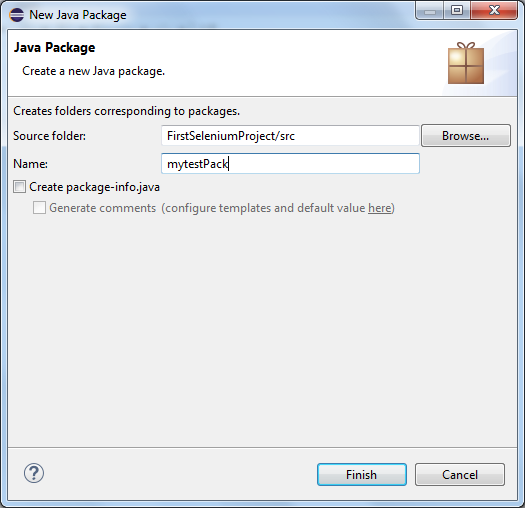
Step 1: All you now have an empty project. To write the source code you will add a package in the project. Right-click on Project name and select New > Package.

Step 2: Give a valid package name like ‘mytestPack‘ and click on the Finish button.
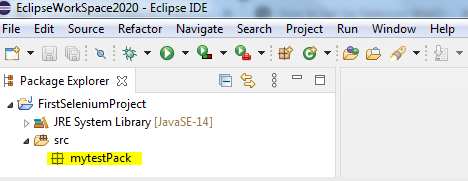
Step 3: The given package would be added inside the src folder.
Create a new Class
Step 1: Right-click on the Package ‘mytestpack‘ and select New > Class.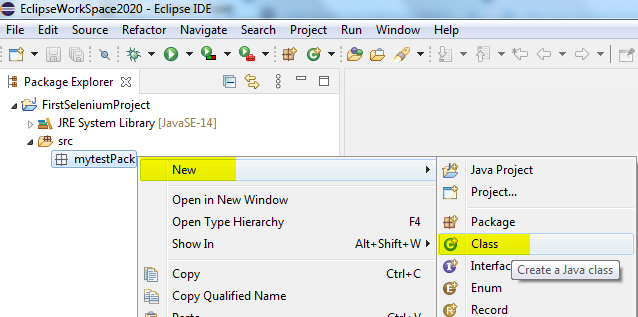
Step 2: Enter the Class name as ‘SeleniumFirstTestCase‘ and check the option “public static void main” and click on the Finish button. This will create a new class wherein you can write your Java program.

Step 3: The SeleniumFirstTestCase will in the Eclipse IDE with an empty main method.

Add Selenium Webdriver Jars to Eclipse Project
In order to write Selenium tests, you need to add Selenium Webdriver jars in the FirstSelenium project.
Step 1: Select project FirstSelenium and Press Alt+Enter Key or right-click on Project FirstSelenium and select Properties > Java build path.After that select Libraries Tab.

Step 2: Select the Classpath option under the Libraries Tab.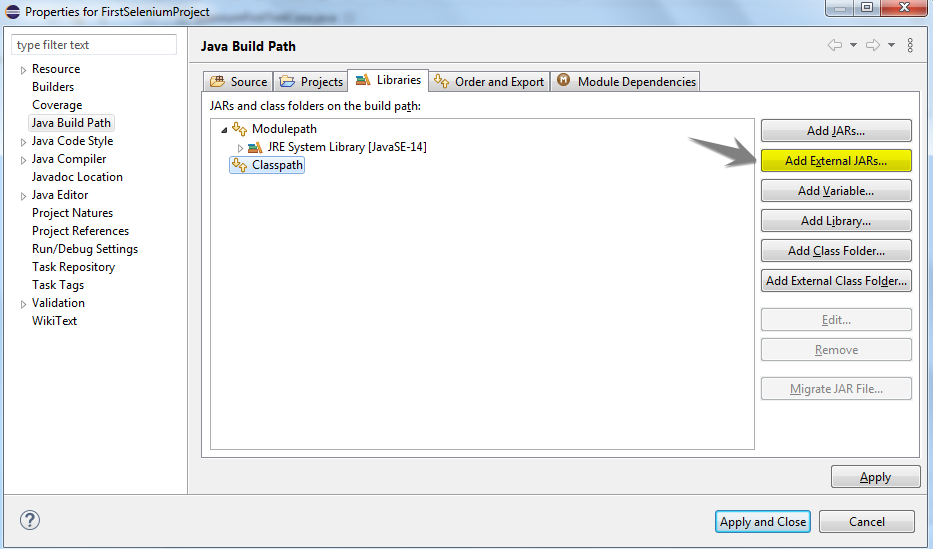
Step 3: Add Selenium client-combined jars and click on the Open button.
Step 4: Repeat the same step. Go inside the libs directory and select all the jars files inside it and click on the Open button.
Step 5: You will see all the required Selenium Jar have been added underneath the classpath. Click on the “Apply and Close” button.
Congrats, you are done with the configuration of Selenium WebDriver with Eclipse. Now can write and execute your Selenium Webdriver test scripts in Eclipse.

In the next post, you can see how to write the first selenium test to run in the Chrome browser.
Recommended Posts
- How To Install TestNG in Eclipse
- Selenium Webdriver Login Test Script
- How to Select a Radio Button In Selenium WebDriver And Do Other Validations?
- How to Set Text Value in TextBox In Selenium WebDriver And Do Other Validations?
- Click a Button in Selenium WebDriver and Carry out Other Validations
- Top #23 Most Useful Selenium WebDriver Commands That You Must know