Eclipse is the most favored IDE over the world for writing Java codes and it is broadly utilized by Java developers as well as automation testers. In this article, you will see how to download and install Eclipse. Eclipse is a freeware and a very user-friendly tool. You need to have a 64-Bit Windows operating system to install Eclipse. Eclipse and Eclipse-based applications no longer run on 32-bit platforms or 32 bit JVM. Only 64-bit platforms/JVM are supported.
Steps to download and install Eclipse
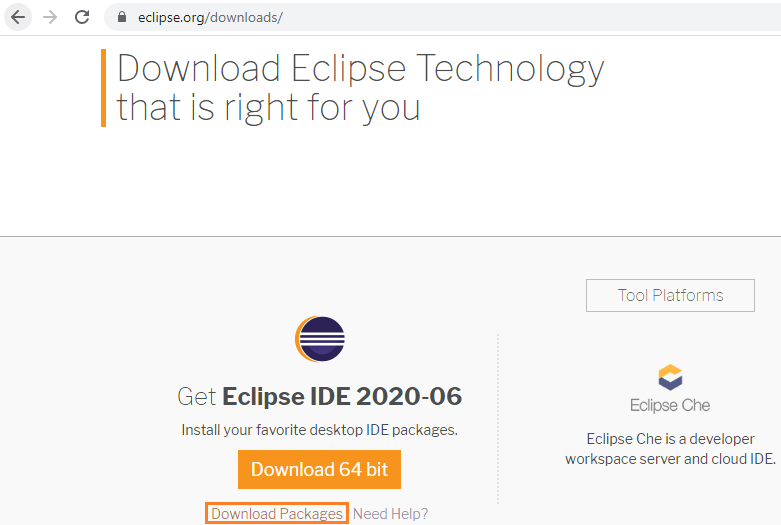
Step 1: Go to http://www.eclipse.org/downloads.Visting this page will always show the latest version of Eclipse. If you want to download any previous version click on the Download Packages link. You can also navigate to download the packages page if you find that the current version is not stable and giving error during installation.
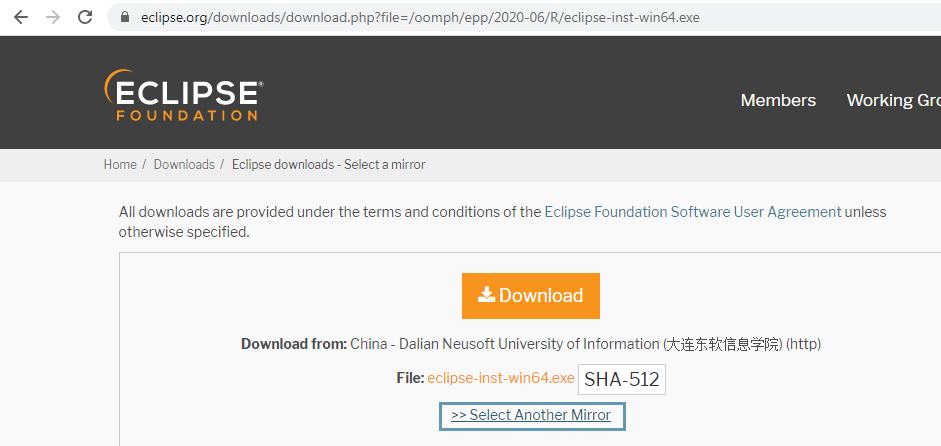
Step 2: The download page will be shown. Click on the Download button. You can also click on the Select Another Mirror to download Eclipse from the country closer to you.
Step 3: The Eclipse.exe file would be downloaded. Run this .exe file to install Eclipse.

Step 4: Ignore the warning and click on the Run button. The following window will appear.

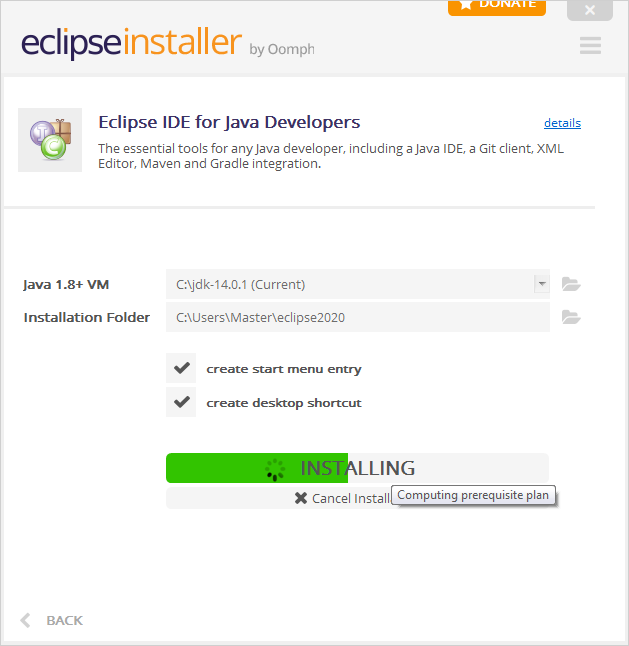
Step 5: Click on the first option as highlighted in the above snapshot.If the JVM path is not picked automatically browse and select it and provide the location where you want to get Eclipse installed.

Step 6: Click on the install button. The Eclipse will start installing.
Step 7: If you see the following window, click on the Accept button.

Step 8: The installation process will be completed.

Step 9: Click on the Launch button to launch the eclipse.

Step 10: Eclipse will start loading with a default workspace location. The Workspace is the location where you can create your Java projects. If you want to choose a different location for the workspace, you can browse that location.
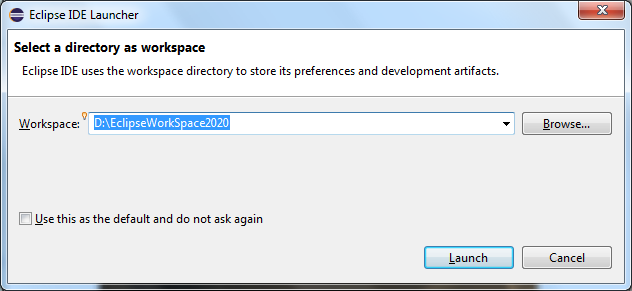
Step 11: Click on the Launch button. The Eclipse will be loaded and the Welcome screen will be displayed.

You can close the Welcome tab and start working. The next time you want to launch Eclipse, you can go to the eclipse installation directory and click on the Eclipse.exe.

You can also launch it from the start menu.
In the next article, I have explained how to download Selenium Webdriver jars and Configure them with Eclipse. Please refer to the article Configure Selenium Webdriver With Eclipse.
Recommended Posts
- How To Install TestNG in Eclipse
- UFT Developer Installation in Eclipse IDE
- Create a UFT Developer | LeanFT Testing Project & Write Your First Test
- Selenium Webdriver Login Test Script
- How to Select a Radio Button In Selenium WebDriver And Do Other Validations?
- How to Set Text Value in TextBox In Selenium WebDriver And Do Other Validations?
- Click a Button in Selenium WebDriver and Carry out Other Validations
- 23 Most Useful Selenium WebDriver Commands That You Must know