In this article you will learn how to install Java and configure environment variable for it. If you are planning to learn Selenium or LeanFT (UFT Developer) with Java , first of all you ought to set up the Java Development Kit (JDK).The current version of Java is 17.0.2.By the time you are reading this article the version may be changed.
Please follow the following steps to download Java.
Download the JDK installer program from Oracle official page:
https://www.oracle.com/java/technologies/javase-downloads.html
You will see the following page. Select the Windows Tab. You will see multiple download options here. I prefer the compressed Archive because it does not required installation. We can just extract it and start working after setting up environment variable for Java. Its up to you can choose either of them.
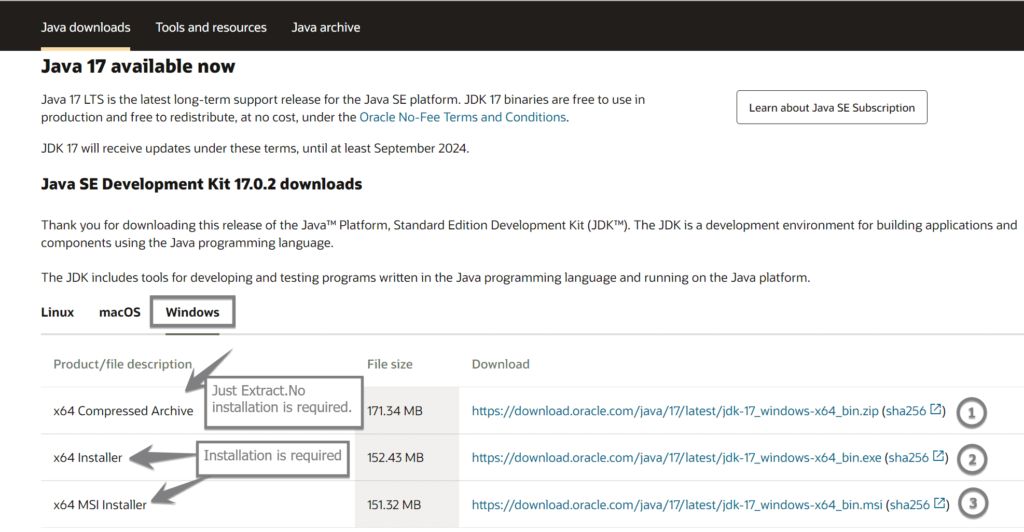
Click on the JDK Download link against Compressed Archive. It will start downloading. Once the download is complete, go to your download folder.

Steps to Install Java Path
Extract the archive file to any directory. I have extracted it under C:\.

Now you will have to set up the Environment variables.
Steps to set the Java Path in Environment Variables
Step 1: Go to Windows Start Menu and type Environment and open it to Edit Environment Variables.

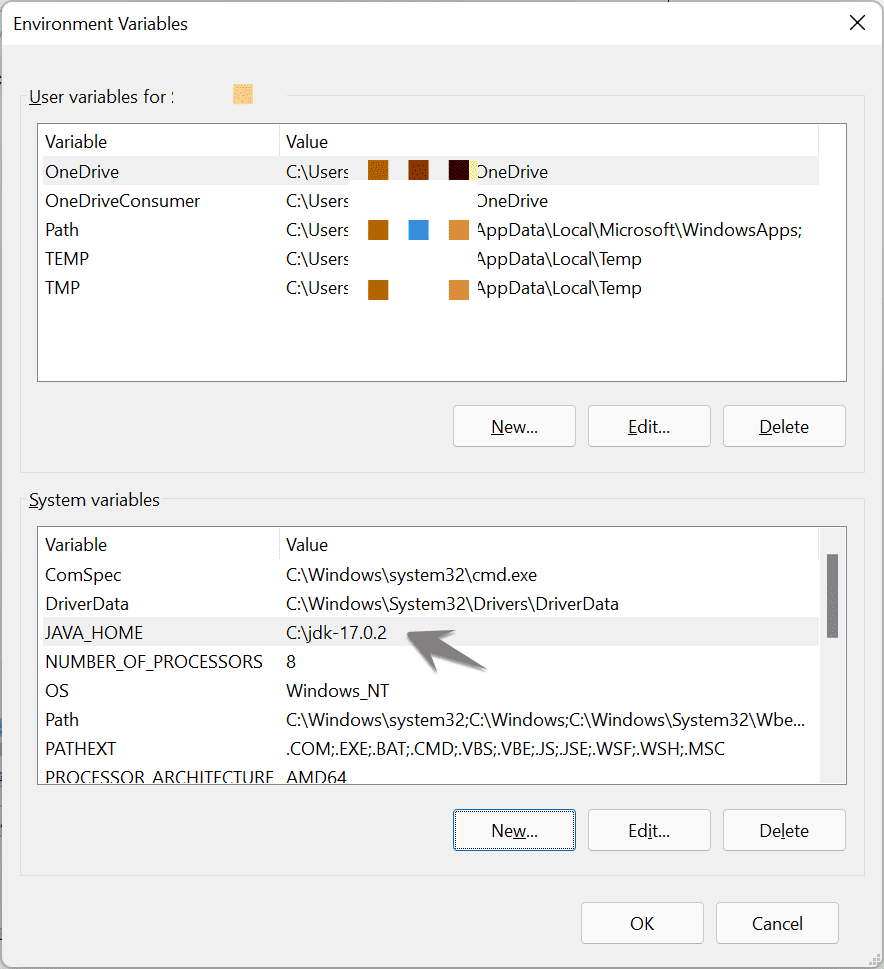
Step 2:Environment Variables window will open. Click on the “New” button under System variables.

Step 3: Type JAVA_HOME (in CAPS) in the Variable name field and provide the path of the JDK directory in the Variable value field.

Step 4: Click on the OK button. You will see that the JAVA_HOME variable has been added to the list of System Variables.
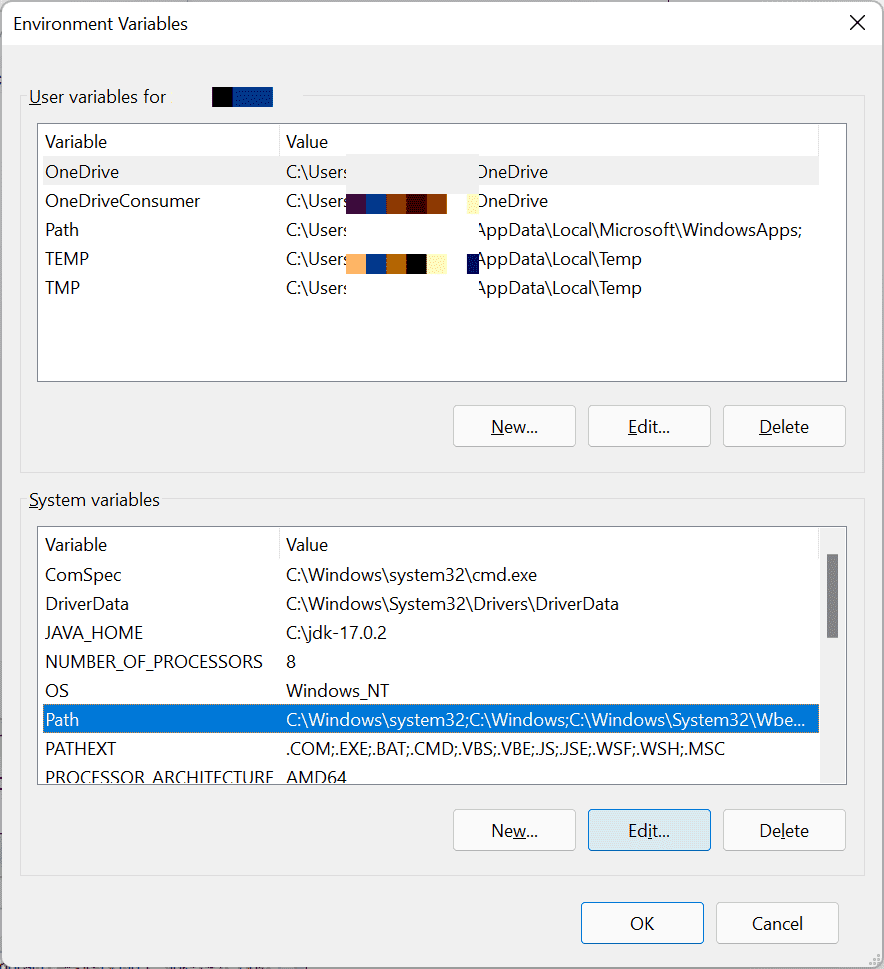
Step 5: Now you will have to edit the Path variable if it already exists or you will have to create a new Path variable in the same fashion as we have added the JAVA_HOME variable. Most likely the Path variable will be there. Select it and click on the Edit button.
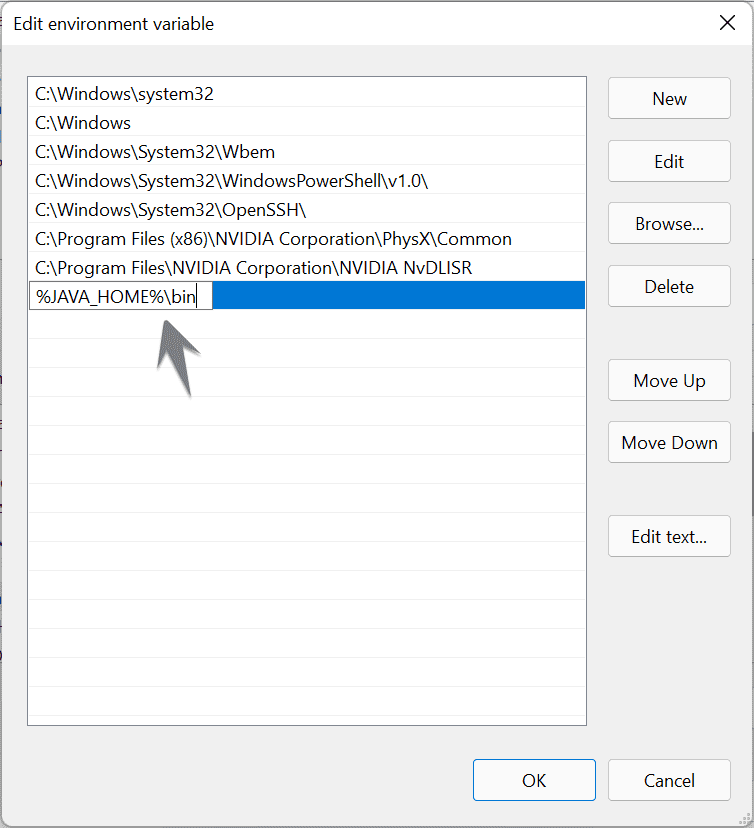
Step 6: The following window will be displayed. Click on the New button.

Step 7: The following Edit Environment Variable window will be displayed. Add the following path %JAVA_HOME%\bin to the path variable.
*Note: If you are working on Windows 10 or lower version and not getting the window as shown in the above screenshot. In that case, click on the Variable value text field and press the End key to move the cursor to the extreme right-hand and type a semicolon and after enter the path “%JAVA_HOME%\bin” that actually point to the bin directory of Java.
*Note: Semicolon(;) is the delimiter to separate multiple path variable values.
Step 9: Click the OK button. The path variable would be updated. Again click on the OK button the apply the changes in Environment variables.
Verify Java Installation
In order to verify that Java has been installed successfully and environment variables have been set correctly open the command prompt or Windows PowerShell and type the command java –version. The command should run successfully and it would display the version of Java that have been set in the path variable.

So now we are done with the Java installation. The next step would be Eclipse installation which is the most preferred IDE to write Java programs. Please refer to the next article How to Download and Install Eclipse.
Recommended Posts
- How To Install TestNG in Eclipse
- UFT Developer Installation in Eclipse IDE
- Create a UFT Developer | LeanFT Testing Project & Write Your First Test
- Selenium Webdriver Login Test Script
- How to Select a Radio Button In Selenium WebDriver And Do Other Validations?
- How to Set Text Value in TextBox In Selenium WebDriver And Do Other Validations?
- Click a Button in Selenium WebDriver and Carry out Other Validations
- Top #23 Most Useful Selenium WebDriver Commands That You Must know


