In this article, I will show you how to use object Repository Manager in UFT effectively when a shared object repositories are used in automation framework. Sometimes the situation arises in real-life projects, wherein you would like to maintain only one object repository for a module rather than having two or more object repositories. In such a situation, you can use the Object Repository Comparision utility available in Object Repository Manager to compare two object repositories at a time to find out the differences between them and merge them if it is required.
Steps to Compare Two Object Repositories Using Object Repository Manager
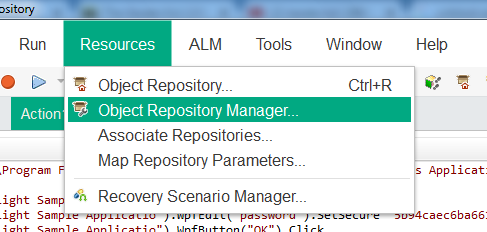
Step 1: Navigate to Resources> Object Repository Manager
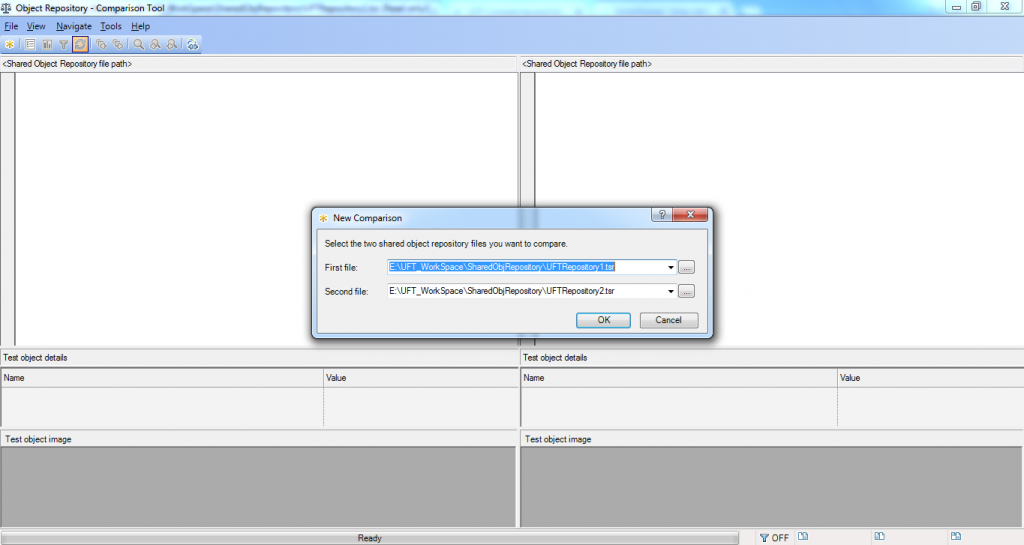
Step 2: Go to Tools >Object Repository Comparison Tool
Step 3: The Object Repository comparison Window opens and you have to select the two object repository files that you want to be compared.
Step 4: The comparison is performed and the result is displayed as shown below.
From the above image, you can observe that there are 10 unique objects in the first object repository that doesn’t exist in the second repository file. However, there is one unique object in the second object repository file that is not available in the first repository file.
Step 5: Click on the funnel/filter icon in the toolbar to add the following filters to do a better analysis.
Merge Object Repositories Using Object Repository Manager
Sometimes maintaining two or more object repositories become an additional overhead and merging two or more repositories into one repository might be the best possible solution.
Object Repository Merger utility provides a provision to merge two object repository without losing the object hierarchy.
Follow the below steps to merge two object repositories.
Step 1: Navigate to Resources> Object Repository Manager
Step 2: Go to Tools > Object Repository Merge Tool
Step 3: The Object Repository Merge window opens and you need to select the two Object Repository files to be merged.
Step 4: After merging, the statistics are shown.If there is no conflict between the objects of the same type having the same properties you will see the following statistic.
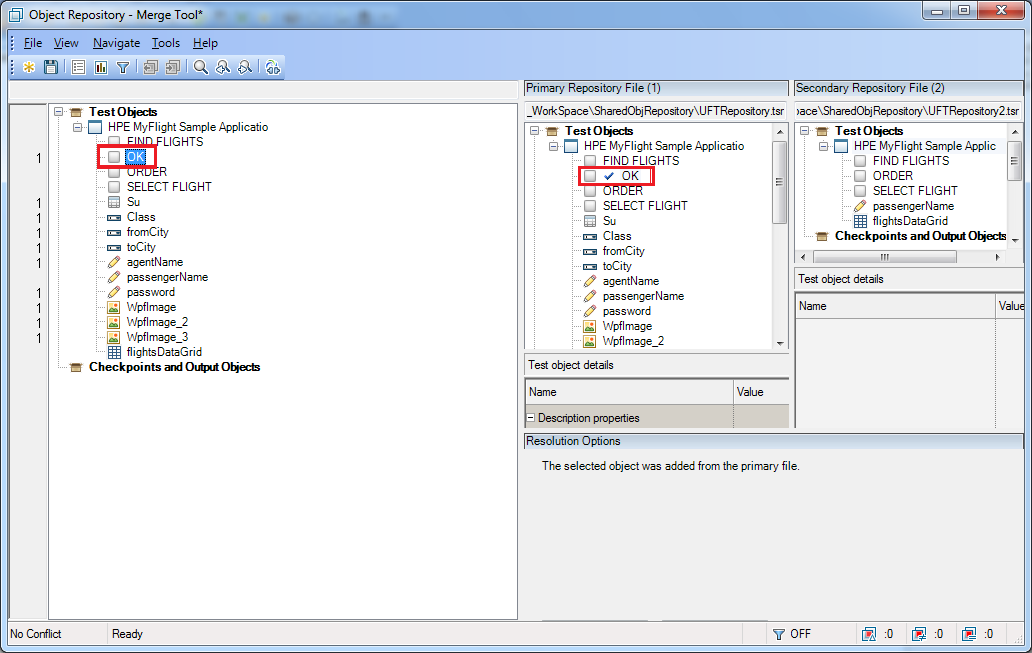
Step 5: Close the Merge Statistic window and expand the Test Object trees. If you select a Test Object in the newly merged Test Objects repository, the actual Test Object either from the primary or the secondary repository file gets highlighted indicating that a particular test object has been copied to the newly merged repository file.
Step 6: You can also click on the funnel/filter icon in the toolbar to show objects based on the following parameters viz – show all objects, show only conflicting objects.
Resolve Conflict while Merge Object Repositories Using Object Repository Manager
Now we will learn how to resolve a conflict that might happen at the time of merging two repositories.
If there is an object with the same name in the primary as well as the secondary repository but having some differences amongst object properties there would be a conflict and the same will be displayed in the merge statistic.
Steps to Resolve Conflict in Object Repository Manager
Step 1: Analyze the properties of the required object in the Test object details pane for both the repositories. As you can see below the image there is a difference in the text property of the test object “SELECT FLIGHT”. In the primary repository file, the value of the text property is “SELECT FLIGHT 1” however in the secondary repository file it is “SELECT FLIGHT”.Decide which one is having the latest updated property. You can take the help of the Object Spy tool.
Step 2: Once you have decided which one you want to keep in the newly merged repository. Go to the Resolution Options pane and select the valid option.
Step 3: Go to “File>Save” As and save the merged objects in a new repository file. Now you can use this new repository file wherever it is required.
Recommended Posts


