UFT 11.5 onwards, HPE introduced a new feature in UFT called “Insight Object“. Insight Object in UFT is an image-based identification that enables UFT to recognize objects of an application based on what they look like, rather than object properties that are part of their design. This feature is useful if UFT is not able to identify certain objects in the application or the technology of the test application is not supported by UFT.
With Insight, UFT stores an image of the object with the Insight test object (along with ordinal identifiers, if necessary), and uses this image as the main description property to identify the object in the application
You can edit the Insight Object properties such as its name and image. You can also define visual relation identifiers to identify the required object based on its relative position with respect to other objects in the application.
There are two ways of adding Insight Object in the Object Repository.
- Using “Insight Recording” mode during recording sessions
- Adding test objects to an object repository manually.
Add Insight Object in UFT Test Script
Step 1: At the time of recording, you can change the recording mode from default mode to Insight Recording mode.UFT will start recording objects as insight object. However, all text objects will be recognized as WinObject.
Step 2: Open the Object repository and click on the + icon to add an insight object to the object repository.
While adding objects manually to the object repository, UFT gives you two options. Automatic learning mode and Manual Learning mode.
You can choose either of the options. If you choose Automatic learning mode, UFT automatically detects the borders of the control and takes a snapshot of it. This mode is the faster mode and should be satisfactory in most cases.
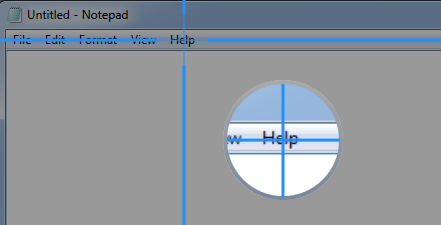
If you choose Manual learning mode, the mouse pointer changes to a crosshair, with an adjacent circle displaying a magnified image of the area around the center of the crosshair.
You can accurately select the required border area of the image to add as Insight Object.
After precisely marking the border area of the object click on the Save button.
The Insight object will be added in the object repository as a child of the test object that represents its containing application, such as a Window or Browser object. The object repository also displays the snapshot of the Insight Object in the Test Object Image Pane as shown below.
Use Manual learning mode in cases where the automatic mode does not correctly detect the borders of the control, such as when it selects an area of the application which is much larger than the control.
Test Script with Insight Test Objects
You can create an automation script using Insight test objects in the same way as you would with other types of test objects.
The only difference here would be that in the UFT Editor, the test object image is displayed in the step instead of the test object name. When you hold the cursor over the image, an enlarged view of the image is displayed. Double-click the image to open the object repository with the InsightObject selected.

Running tests with Insight Object
During a run session, UFT searches for the Insight test object that matches the image stored with the test object.UFT searches for the matching object within the Insight object’s parent test object.
UFT’s image matching algorithm allows for some variation, enabling UFT to recognize the object even if it changed slightly. However, the algorithm is not based on object properties and therefore does not use the smart identification mechanism.
Customizing Insight options in UFT
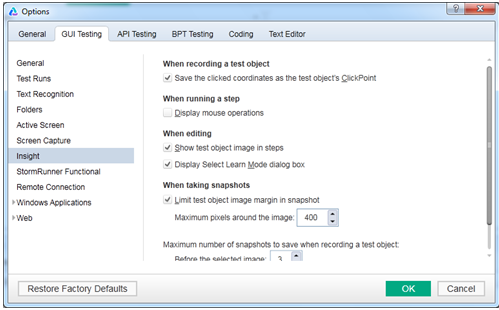
Insight test objects require more disk space than other test objects, because of the test object images and the snapshots stored with the test objects.
Go to “Tools>Options>GUI Testing>Insight“. The Insight pane provides a provision to turn on and off the various option that will be taken care of by UFT at the time of creating a test object, and during record and run sessions. The options are self-explanatory as shown in the below images.
Difference between Virtual Object and InsightObject
However, the insight object is not mapped to any standard classes. It’s purely an image-based object identification. When adding Insight objects to an object repository, you can add an object directly from the application, or even from a picture of the object displayed on your screen.
*Note: After you add all of the relevant test objects and finish modifying them to your satisfaction in the object repository, you can delete all of the snapshots to reduce the amount of disk space used.
Recommended Posts