Bitmap Checkpoint is used to validate whether a visible area of your application is displaying correctly by capturing the required area as bitmap before and post-execution of the Test. You can select the entire page of the application or an area of an application. It does a pixel by pixel comparison between actual and expected images. You can also define percentage tolerance for RGB Color variance and Pixel tolerance up to a certain extent that might vary from machine to machine.
You can add a checkpoint to the entire window/page of the application or you can select only the required portion of the application.
How does the Bitmap checkpoint work in UFT?
During the recording session when the Bitmap checkpoint is added UFT captures the bitmap of the application(or specified area of application) and stores it in the Bitmap Checkpoint. At runtime, UFT dynamically captures the bitmap of the application and compares it with the previously captured bitmap stored in the checkpoint. If both previously captured and currently captured bitmap is matched, UFT will report it as Pass else it will report it as Fail.
You can create bitmap checkpoints for all supported testing environments (as long as the appropriate add-ins are loaded.
Unique Features of Bitmap Checkpoint in UFT
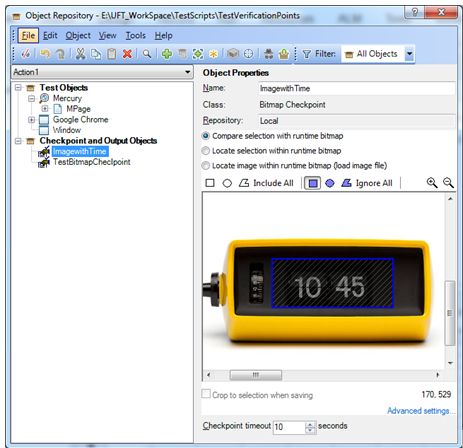
- You can specify areas of the object to ignore or include in the checkpoint. Suppose you are capturing an area of an application that shows the time that may cause the checkpoint to fail.you can instruct UFT to ignore it during the run session by excluding the area in which it is located from the comparison.
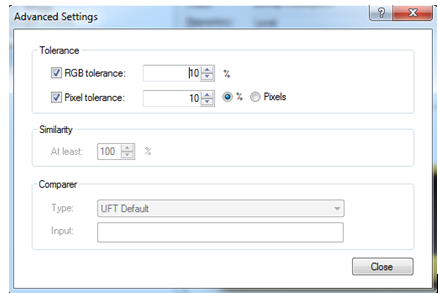
- You can define tolerance settings in RGB color variance in the checkpoint to work it at across all machines because different machines might have different color settings.
- If the Bitmap Checkpoint fails, UFT saves the runtime bitmap and displays it next to the expected bitmap in the run results. You can also view a bitmap that reflects the difference between the two bitmaps, to assist you in identifying the nature of the discrepancy.
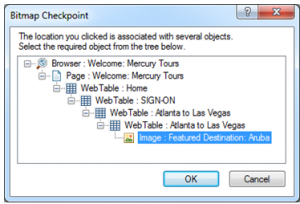
How To Add Bitmap Checkpoint on Entire Object

Adding Tolerance to RGB color in Bitmap checkpoint
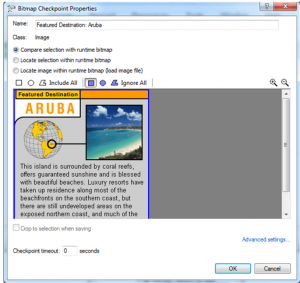
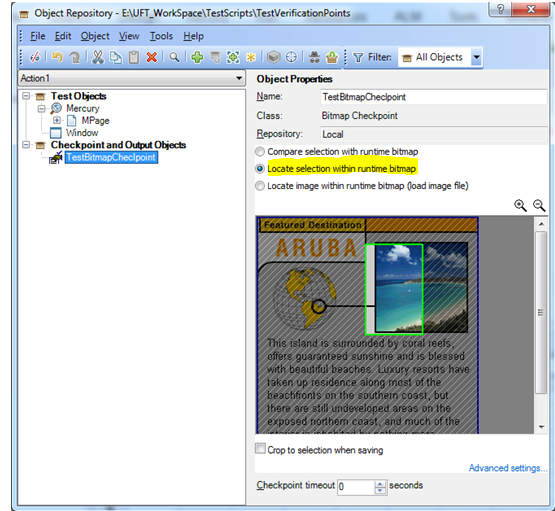
How To Check a selection within the runtime bitmap
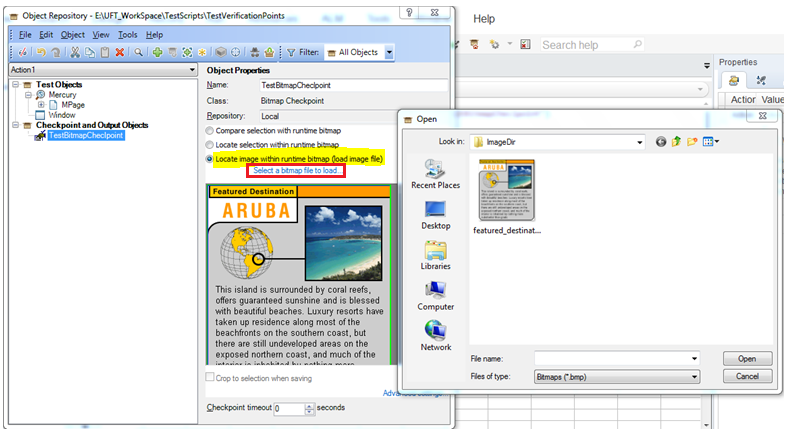
How to Use Locate image within runtime bitmap (load image file)
Recommended Posts
- How to Use Insight Object in UFT
- Amazing Facts about Object Repository Manager in UFT
- How to Use Visual Relation Identifier in UFT with Example
- How to Use Virtual object in UFT to Identify Non-Standard Class Objects
- How to Use Shell Scripting in UFT to SendKeys
- How to Use Test Combinations Generator in UFT
- How to Use Data Driver for Automated Parameterization in UFT