In my previous post, I have discussed the types of checkpoints available in UFT.In this article, we will get to know how we can add the following most frequently used checkpoint in UFT.
How to add CheckPoints in UFT
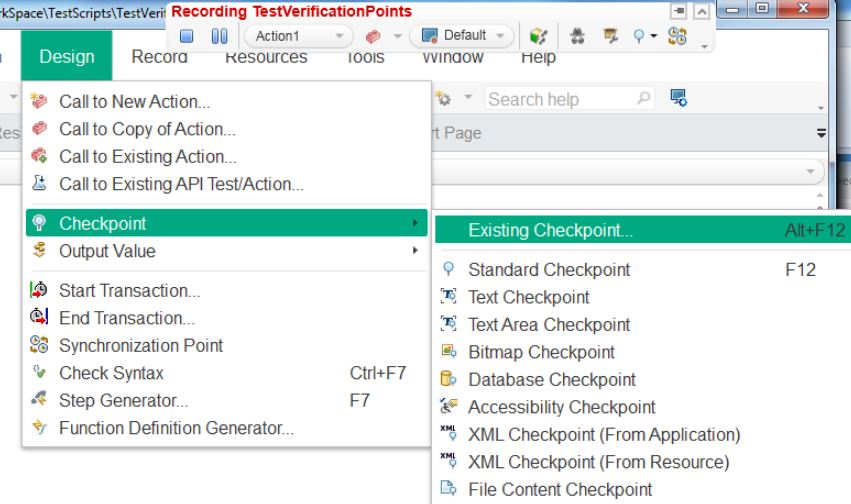
First, let us understand how we can add the checkpoint. To add a checkpoint you can go to Design>Checkpoint and select the required checkpoint as mentioned above.

The other option to add a checkpoint is to use the Recording Session GUI. When we start the recording session a small recording session window is displayed. Click on the balloon icon, it will display a menu to add the required checkpoints.
Adding Standard Checkpoint
Select the Standard Checkpoint option, the mouse pointer will turn into a hand, click on any object like a hyperlink, Textbox, radio button, or on any text of the page, the Checkpoint property window will be displayed. You can select the properties of the object that you want to validate at runtime and click the OK button.
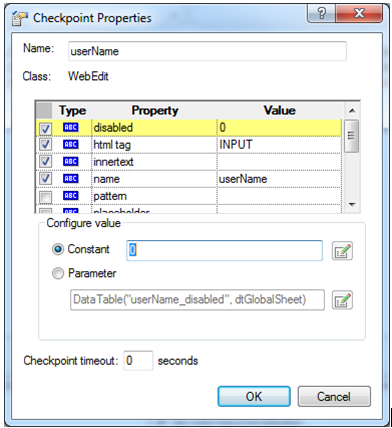
UFT will automatically add a step in the current action of the Test.
![]()
Adding Image checkpoint
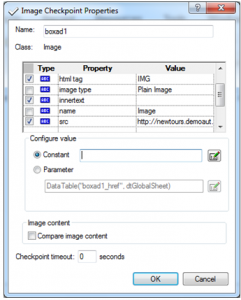
The Image Checkpoint Properties window will be displayed with all the properties of the image. Click on the OK button. The image checkpoint will be added to the script.
Adding Table Checkpoint
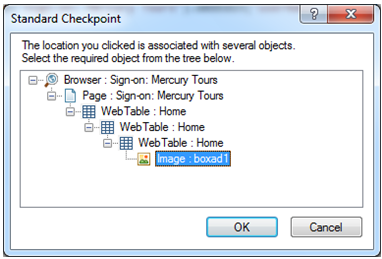
Select the Standard Checkpoint option, the mouse pointer will turn into a hand, click on the grid or table displaying in the application. A Standard Checkpoint window will be displayed with the default selection of the object on which you have clicked. Select the Table object one level above it in the object hierarchy as shown in the snapshot and click on the OK button.

The Table Checkpoint Properties window will be displayed with all the values currently displaying on the table. It also has two square boxes on the top right one as checked and another as unchecked. If you want to ignore the value of a particular cell, select the required cell, and click on the unchecked cell. You can also double-click on a cell to check or uncheck it. Click on the OK button. The table checkpoint will be added.

Recommended Posts
- How to Use Insight Object in UFT
- Amazing Facts about Object Repository Manager in UFT
- Actions in UFT One with Examples
- How to Use RegisterUserFunc in UFT with Examples
- How to Use Call Stack in UFT to Trace Function Calls with Example4
- How to Download and Install UFT One
- Difference between ChildObjects and ChildItem in UFT


