Recovery Scenario is used in UFT/QTP to handle unexpected events and errors that occur in your Testing environment during a run session and cannot be predicted in advance.
For example, you are navigating to a URL to login to your test application, assume suddenly a Certificate Error pop-up window comes up asking you to either close the browser or proceed with an invalid certificate. This issue does not happen every time when you navigate to the specific URL or this could be a machine-specific error. Now if you have written a code that navigates to the required URL and expects the login page to get appeared to enter the credentials, the test script would fail if the Certificate Error pop-up comes up randomly. Adding a recovery scenario is the best solution to handle such types of unexpected errors during the execution.
Steps to Create a Recovery Scenario in UFT
Step 1: Go to the “Resources > Recovery Scenario Manager” and click on the “New Scenario” icon.

Step 2: Click on the Next button.

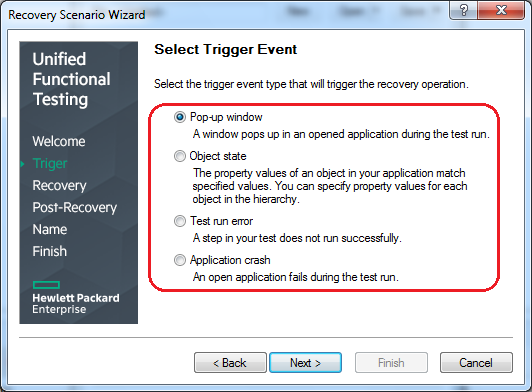
Step 3: You have to select the trigger to invoke the recovery scenario automatically at runtime. There are four types of Triggers as shown below. Choose according to your scenario. Here I am selecting a Pop-up window. The rest of the options are self-explanatory.
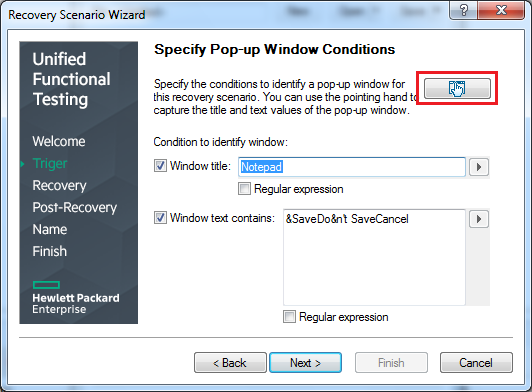
Step 4: Click on the “Pointed hand” button and click on the unexpected window that you would want to be added to the recovery scenario.
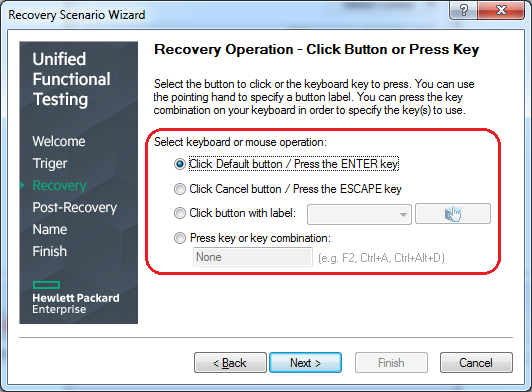
Step 6: Select the required recovery option and click on the Next button. I am going to choose “Keyword or mouse operation”.

Step 7: The message on this window quite self-explanatory. Select the option whichever is the best option. I am proceeding with the default settings and click the Next button.
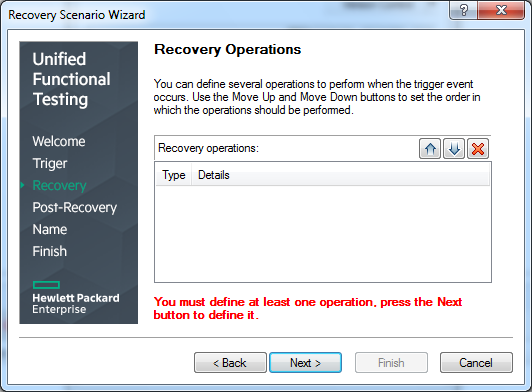
Step 8: The recovery operation gets added to the list. If you need to add more than one recovery operation you can keep the “Add another recovery operation” checkbox checked and click on Next else if you are done then uncheck the checkbox and click the Next button. If you proceed with the “Add another recovery operation” checkbox with checked status then it will take you back to Step 6 to add another recovery operation. I am proceeding further by unchecking the checkbox.

Step 9: Next you will be asked to define the post-recovery operations. I am choosing the “Proceed to next step” option. Click on the Next button.


Step 11: Now before completing the process of adding a recovery scenario, you will be given the option to choose whether you want to add the scenario to the current test or in the default test settings to get it added on all tests. I am going to keep them unchecked at this point because I want to show you how an automation tester can associate a recovery scenario with a test explicitly. Click on the Finish button.

Step 12: The recovery scenario would be shown in the scenarios list. Click on the Save button.
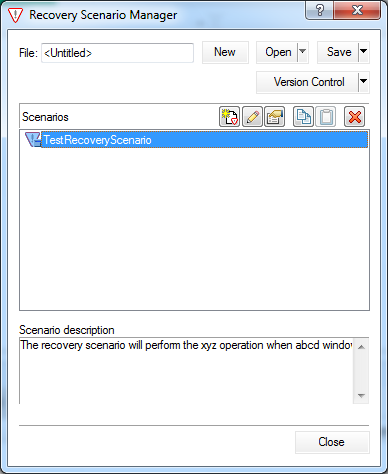
Step 13: Save the recovery scenario to the required location. The recovery scenario will be saved with .qrs extension and close the window.
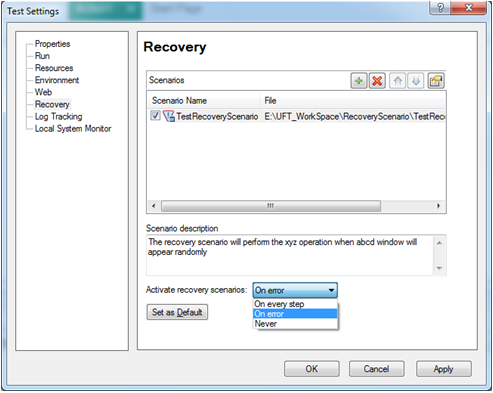
Step 14: To associate a recovery scenario to a test go to File>Settings and select the Recovery option.

Step 15: Click on the + icon. Add Recovery Scenario window will be displayed with the browse button and browse the recovery scenario file that was created in the above steps and click on the Add Scenario button.

Step 17: The recovery scenario will be associated with the test. UFT TestSettings gives you an option to select when do you want to activate the recovery scenario. The best option would be to go with “On Error“.Click on Apply then Ok button.
Maintaining Recovery Scenario in UFT
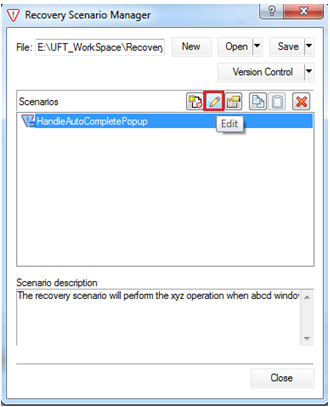
Click on the “Edit” button as shown in the above image. The Recovery Scenario Wizard window will be shown. Click the Next button and repeat the same steps that are mentioned to add a recovery scenario. Do whatever changes you want and save the recovery scenario.

Recommended Posts
- What are new features in the new UFT One Datatable
- Action Input And Output Parameters In UFT
- How To Use Dictionary Object in UFT With Examples
- Import Excel File into Datatable in UFT
- Difference between ChildObjects and ChildItem in UFT
- How to Record a Script in Chrome Browser in UFT
- How to Load Function Libraries in UFT at runtime.


